
Learning curve Round table and JL Teleporter.
by George William Flatt
Competitive or not?
I have heard for a while now many people saying that there are no really good resources anymore since the rotation happened. That in my opinion is simply not true, whilst yes the unbalanced resources are now gone (which is a really good thing!!), there are still some decent resources out there. The Supreme Intelligence resource for one is fantastic for what it can do for a simple 12 points. This article today is to discuss just how good the Avengers Round Table (ART) and Justice League Teleporter (JLT) are and how you can go about using them to the best of their ability.
This article will not go into deep information regarding how to use the ID cards on their own or what ID cards are best, that is way too much information to squeeze in here AND you need to decide for yourself which ID cards you prefer according to your play style. This article will also assume you already know about the abilities supplied from the ID cards such as “Call in Help”. In order for us to go on this adventure together we will break it down step by step, let’s start with obvious stuff first then progress to how you can change your game completely with this resource.
Firstly, when building a team using the ART or TELE remember that you use the ‘Setup’ information of the resource card and NOT the ‘Setup’ information on the ID cards. What this means is that you will not be restricted to only having a number of ID characters and ID cards equal to the number of figures on your team! For example, if I use a OMA with say KC Superman, if I use ID cards on their own without the resource I will only be allowed to add one ID card to my force, however should I be using the ART or TELE, I will be allowed to bring up to 6 ID cards (so long as I can pay for them) even though I only have one Character. This is very important and comes in extremely handy and will be explained as we go along.
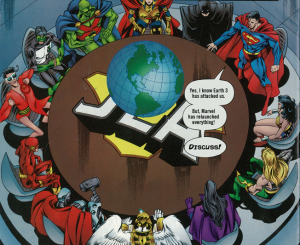
The JLA took over the Avengers Round Table!
Force Construction – Avengers Round Table/Justice League Teleporter costs 5 points. Up to 6 distinct ID cards may be attached to this resource by paying their point cost. ID cards may not be included in your force in other ways.
This first prerequisite explained are their cards means the following: you can play the teleporter for anything from 5 points up to 35 points in increments of 5. So if your team has a gap left over of say 15 points, you will be able to bring in the resource and 2 ID cards attached. This also means that you cannot have multiples of any one exact same card, for example, I cannot have two Thor cards attached each needs to be unique! Also please remember that even though the S.H.I.E.L.D Level 7 ID card is not unique and could be played with multiples when you play without the resource, when you do actually play with the resource, this rule prevents you from having more than one attached! Lastly this explains that you cannot have ID cards added in any other ways. So you can use the resources with say 6 ID cards and then have Jarvis on your team to add 3 ID cards also.
Setup – ID cards are attached to the resource starting with ID slot #1 and filling each Slot incrementally. Each Id slot with an attached ID card during force construction is called an active slot, even if the ID card has been removed.
This next part explains what happens during Setup – Meaning at the beginning of the game. During Force construction, you declare how many as well as which ID cards you will be using however, the placement of these cards as well as choosing which figures to use with the ID cards are done during the game setup at the very beginning. What this means is that between games and rounds, you will be able to change the order of your ID cards to fit the needs of the game ahead. This becomes important when you start using the “Call in the Reservists” abilities and will be explained more a little later.

Teleporter
Starting with Slot 1 and attaching incrementally is quite self-explanatory, however there is more to it than just place any cards in any order (at least if you thinking of the bigger picture) this will also be explained in the “Call in the Reservists” section a little later.
Each Id slot is called an active slot, even if the ID card has been removed. This is also an important rule to remember because what this really means is that even if you use all 6 of your ID cards, your resource won’t go away!! Your opponent will score the 5 points yes, however you will still be able to keep the resource in order to potentially use the “Call in the Reservists” ability again.
The other reason that they keep the slot as active if because of the “Call in the Reservists” power also giving the opportunity to potentially return a removed card back to the resource – More later on this.
Clicking the Dial – When you remove an ID card from this resource using its call in help ability, you may roll a D6 and turn this resource’s dial clockwise that many times. When a friendly character takes damage from an opposing character’s attack, after actions resolve turn this resource’s dial once clockwise and then turn it a second time if the damage assigned to that character was 3 or more. This resource’s dial can’t be clicked beyond click #25.
When you remove an ID card using “Call in Help” you MAYroll a D6 and turn the dial clockwise that many times. Remember that little word MAY, you don’t have to do it and if you happen to be on a power that you want to keep for now such as a “Call in the Reservists” ability on a slot you want to use this turn then re attach next turn, youMAY decide to stay right there and not move the dial, this part of the ability is optional! Also, it is during your own turn, and there are no restrictions to it which means you will be able to use Prob to reroll the dice if you really want to. This can come in handy if rolling the dice again means another chance to land on that “Call in the Reservists” click you are really looking for!
This next part however is not. You need to see this from 2 different points of view though. On the one side, whenever one of your characters gets attacked and damaged, youWILL have to turn the dial at least once. Which might be taking you past the power you wanted or even take you off the power you were trying to keep for next turn. On the other side of the coin though, this power can be utilized on the right teams to push your resource as quickly as you can to its later clicks and better powers. For example, throwing two Morlocks into a situation where the opponent has to attack them first and each of your opponents characters will do 3 damage to the Morlocks, this will allow you to turn that resource dial 4 times that one turn, if you called in help during your previous turn, that means you just turned that dial between 5 and 10 times!!! Either way it can either be a disadvantage or an advantage to you and you need to know which it will be before you play your first game.
Unlike some other resources, this one won’t let you click past its last click. This means that once you get to this resources ultimate goal, it won’t be taken away from you by mistake.
Scoring – Each time an ID card is removed from the resource your opponent scores that ID card. The base cost of this resource is scored if no ID cards are attached. This resource and any attached ID Cards are scored if all friendly characters have been KO’d.
The base cost is scored if no ID cards are attached – but remember that the resource will stay behind so that you can potentially use the “Call in the Reservists” ability later.
When utilizing the resource, even though it doesn’t say it on the card directly, a part of the setup rules on the ID card itself does apply namely the following:
Setup – At the beginning of the game, choose a character on your sideline with a name or real name matching this ID card and turn it to a starting line. This Character is called an ID Character.
As per the actual rule book explanation, each player may have a sideline that contains up to 3 figures per 100 points of the build total. Meaning if you are playing a 300 point game you will be allowed up to a maximum of 9 characters on your sideline. In the case of ID characters, the Characters are chosen as well as their starting line at the beginning of the game. So what you could do for example is have 3 different Dr. Strange Characters on your sideline and choose which one will be more relevant for the upcoming game and use that one. You MUSTdeclare to your opponent exactly which characters you will be using for which ID cards.
You will put each of those chosen ID characters onto their starting line. All other figures need to follow the standard sideline rules and need to all be on a KO click. The biggest thing here is that you can choose which figures to utilize from your sideline at the beginning of each game. This is the first place that this resource could in fact be a game changer.
Right, so now the basics are covered, let’s look at the traits and special powers.
Trait 1. – I Can Help Right Now: you can use any attached ID card’s “Call in Help Ability”
This is pretty much the main focus most people have been using when it comes to these two resources. The ability to trade off 5 points for a character that can quite literally change the game or get you out of a situation is well worth it. Your opponents have stuck themselves behind a wall or barrier, bring in Iron Man to shoot them right through the walls or blocking leaving them open for your other figures to attack. Your opponent sitting stealth in hindering or can’t be targeted for some reason, bring in a pulse wave figure like trinity Batman. Need to tie up someone for a turn, bring in a figure to base the opponent. Very much well worth the 5 points in most situations. Then you get to roll and turn the resource dial closer to the later clicks.
Assist me!
There are several teams that rely on bringing in the ‘hard’ hitters using the call in help ability such as the Trinity war Lex Luthor who cannot be targeted unless you started the turn adjacent to him. They use that figure at 200 points and never attack with him, they just keep calling in help with figures like the 200 point wonder woman that has sidestep charge flurry and 11 attack 4 damage. That’s potentially 11 damage in trade off for 5 points to your opponent. And that’s just 1 call in help.
Imaging the following if you will:
Wonder Woman – Sidestep, Charge, Flurry, 11-Attack, Super Strength, 4-Damage
Giant Man – Charge, Flurry, Perplex, Special Quake that also gives tokens, Outwit twice, Ant tokens, 11-Attack, 4-Damage
A-Bomb – Charge, Flurry, 11-Attack, 4-Damage
Iron Man – Charge, Running Shot, PPB, IT hindering and destroys blocking, Outwit, 11-Attack, 3-Damage
All of which are easy enough pieces to get your hands on and can truly destroy your opponents plans. And for a measly 5 points each, Bargain!
Trait 2. – I’m Better Suited for These Foes: After revealing your force but before placing characters in your starting area, you may replace a friendly character on your force with an ID Character of equal or less points from your sideline. That Character is no longer an ID Character and It’s ID card is removed from this resource.
Probably the most underused and often forgotten traits. Personally I find this trait to be potentially more powerful than any other. In the right team this will decimate your opponent’s plans even before the game begins. What this allows you to do is to actually build a team that is way more points than your opponent, is more versatile and once again can change the game straight away.
There are two ways to really build around this trait:
The first way is to build a sideline with an assortment of figures that can do many different things and then switch out before the game begins. If your team is lacking in a particular area that you are worried might come up during the tournament, then have a figure that deals with that area on your sideline to swop out should you need it. Let’s say for example you have a great team that you really like but its week against pulse wave. You are not really sure if each opponent will bring Pulse Wave or not.
Your team consists of
Kitty Pryde Prime 65 pts
Chase Sunfire 80 pts
SR Iceman 110 pts
Your opponent drops a team with no less than 4x Riptides who each have a crazy Pulse Wave special and you are worried that you can’t out action him or hide from him enough for those pulse waves to not be a problem. You have a JLT with the Superman ID card and SMWW041E on the sideline, you switch your Kitty Pryde for the Superman and now are a lot less worried about the Pulse Waves!
Boom, game changed!
The second way to play this is with the one-man army or tentpole figure. Let’s say you play a team of one main hitter and two support figures or a one man army. This trait allows you to build for almost any eventuality that may arise and then switch accordingly. Have a primary attacker that is good at close combat but not range and your opponent can out-manoeuver you? Switch him out for a figure more suited to the task. Your opponent brings a team that prevents you from targeting him all the time? Switch your crazy shooting piece for a crazy close combat piece. You effectively will be able to have up to 7 figures to choose from each game! The best thing is that if your team was a theme team before hand and you switch out the character, IT WILL STILL BE A THEMED TEAM!! Look a little more closely at this power, it may save your game!
Trait 3. – Call in the Reservists: At the beginning of your turn, if a “parachute crate symbol” number is revealed and that ID slot is active and empty, you may place an ID card that was removed because you used the “Call in Help” ability into that slot. If you do, turn this resource’s dial once clockwise.
Another big trait that can make things sway well into your favor IF you manage to get it to work. This is a great trait to have and you can plan ahead for it hoping that it might just work. It’s not guaranteed in anyway but there are a few ways you can increase your odds just a little. A little pre-planning for ID card placement in case you can get this to work is also a good idea.
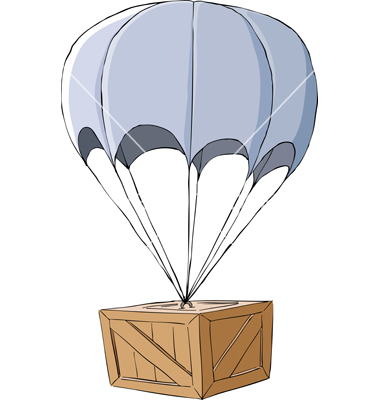
Wooden box with a parachute, vector illustration
Generally speaking you have very little control over this resources dial from clicking and for stopping it where you want. But what you do have control over is the ability to ensure you get more clicks when you need it.
Let’s say for example you had Iron Man’s ID card in Slot #2 and you were on click #5. You, knowing your resources dial (imperative), know that the Reservist ability for slot #2 is 2 clicks away, knowing that if you use your Iron Man ID card now, there is a chance you could get it back again and prepare to use it a second time. So, you call in your Iron Man ID card. Now you must decide, do I roll the D6 for using the call in help and turn the dial or not? If I do, on a 3-6 I don’t get my Iron Man back. So you choose not to because you know your opponent has a figure that will deal 3 or more damage next turn, if you make him. Of course you keep this in your head otherwise your opponent won’t do it ;).
You call in the Iron Man and let him do his thing. You then position one of your figures that it locks up your opponents figure in their turn, forcing them to either attack the figure or try break away. Normally they will attack the character as they don’t want to risk missing the breakaway roll. When they do your figure takes the 3 damage and your resource turns 2 clicks right onto parachute crate #2. Beginning of the turn, you attach the Iron Man ID Card back onto the resource and can now use it again at a later stage! Four clicks away is parachute crate 3, and you start thinking ahead already!
This is also where the placement of the ID Cards order shouldn’t be just a simple place anyone anywhere thing but rather a well thought out plan of action. Knowing your team and studying your opponent’s team will tell you what your odds are of getting parachute slot #1 or #2 first and will also tell you what call in figures you might need after that.
Plan, plan, plan!
Now onto the special powers.
Special Power 1 – Lending Moral Support: At the beginning of your turn, you may choose a friendly character and roll a D6. Until your next turn, that character can use the inspiration of the ID card in that slot.
The second most used part of this resource from what I have seen so far. Seems like a very useful ability to give a random power to one of your figures doesn’t it? Or does it? Mwa ha ha. Ahem sorry.

Rarely ever roll the number you need!
Remember that you are choosing the ID cards and don’t have to use them to call in help. You can just use them for the Inspiration abilities. One thing that is becoming more and more common is that people build the ART or JLT with 6 ID cards that all have the same Inspiration or basically the same inspiration, such as 6 ID cards that all give +1 defence. By doing this you are guaranteeing that the figure of your choice will be getting the exact power or modifier you want. I hear you saying well, that’s 35 points for just that????? A simple +1!
Not really actually, remember that in most cases, that +1 that you are trying to guarantee, will in fact make a difference or you wouldn’t be looking to get that guarantee. Also, +1 means the difference between 19 and 20 defence or 10 and 11 attack etc. beyond that, you are still getting the potential call in help also for those 35 points.
Once again, very well worth it. Usually when played this way, it really doesn’t mean much getting the dial to the mid dial for the second special power, but do it anyway, you never know when you might need to call in help and then you have empty slots you might roll by mistake plus (spoilers sweetie) special power 2 allows you to boost your whole team. Also you might just get to Special Power 3, who knows. Even if you don’t use it that way and just use it for the ability to switch characters before game begins or to call in help, it’s still an extra bonus to be able to get an extra stat boost or power each turn.
Special Power 2 – I can’t get there but I can advise: At the beginning of your turn, you may choose an ID card attached to this resource that you didn’t choose last time. Until your next turn, friendly characters can use the inspiration of that card.
Largely the same as the first power, however a few little things to note and potentially plan for. Firstly, if you run the whole resource with the same power or boost, you will now give that to your entire team, imagine an entire team with Prob or +1 defence mid to late game, Boom, Game changer again!
If however, you planned ahead a little and planned on potentially getting to this power, you may have planned that each card with give you a different ability. By doing it this way, you are now in a situation where you can choose what you need each turn! Your opponent ranging you, ESD, your opponent got medium attack against your friendlies, +1 def. you choose what you need most when you need it! Again this can quite easily change the game up quite a bit maybe even enough to swing it in your favour and garner you with the win!
Special Power 3 – The World needs us: At the beginning of your turn, give any number of friendly characters power actions. For each one given, remove an ID card attached to this resource and place its ID Character adjacent to the character given the action. This game, that character is no longer an ID Character, Can’t ignore pushing damage and returns to your sideline when it takes damage.
This power is a really powerful one! And as such is rightly right at the end of the very long dial. Odds are though, that if you got to this point in the dial it’s been a long game, you have already removed several ID cards and several figures have taken probably a lot of damage. What does that mean though? What that means is that you probably won’t have many figures left to bring in a lot of ID Characters all at once and also that you probably won’t have many ID Characters to bring in either, unless, you planned carefully and utilised the Parachute crate powers to its best ability, then you still have several ID cards to bring it.
The greatest thing about this power is that the figures don’t go away with the standard ID card rules. They can be switched out like with merge, they can be carried, they may even become pilots of vehicles! There only restrictions are that it can’t ignore pushing damage and when it does actually take damage (any damage) it disappears again, so better keep clearing him if you want him to stick around, or push to do something major. Remember also that if you damage the figure in ANY way it will go back to the sideline.
Use your normal figures to tie up the opponent whilst these take pot shots at them. That is about it from me for now, if you made it this far, thank you for taking the time to read this article. I hope it helped you in one way or another.
Remember that no matter how you choose to play the ART or JLT (or any resource) make sure that you know what it can actually do in total, you might need to switch tactics mid game!!!
The dice of Zeus always falls luckily – Sophocles (You are not Zeus, Plan ahead)
